Part 1: Tracking Subscriber Behavior and Other Helpful Pardot Tips
As a digital marketer, it’s important to understand why a prospect chooses to opt out from emails. This information provides valuable insight into where our email marketing efforts are falling short. There could be a number of reasons why they decide they don’t want our emails in their inbox anymore too–maybe they never opted in and were from a purchased list, or maybe they just aren’t interested in your content anymore. No matter what the reason, we want to provide a mechanism where they can tell us why.
Depending on where you do business, there are a number of legal obligations you need to take into account when sending email marketing. In the United States, the CAN SPAM Act first established national standards for the sending of commercial e-mails. In Europe, new GDPR regulations are arguably the world’s most sweeping privacy laws. In any case, a solid rule of thumb is that the client should be able to opt-out in two clicks. One click to get to the preference or unsubscribe page (from within the email), and then another click to actually opt out.
Helpful Tip: For people reading this in European countries, Salesforce has created a page dedicated to understanding how Pardot customers can comply with GDPR.
As an important aside, in any Pardot email, you’re required to link to a unsubscribe page and/or a preference center page. I recommend linking ONLY to the preference page from your marketing emails. Instead of opting out of all communications at once, prospects can visit the email preferences page, see which lists they’re on, and add or remove themselves only from specific lists.
With all that said, I recently worked on a solution for a client to track ‘opt out reason’ within Pardot. Here’s what you’ll need to recreate:
- Custom Radio Field
- Form
- Unsubscribe Page
Additionally, there are some optional configurations, which you would be well-suited to address. I’ll cover these as a second part of this post because I think they should be made in any Pardot account:
- Layout Template (for Unsubscribe Page and Preference Page)
- Preference Page
- List (at least one public list)
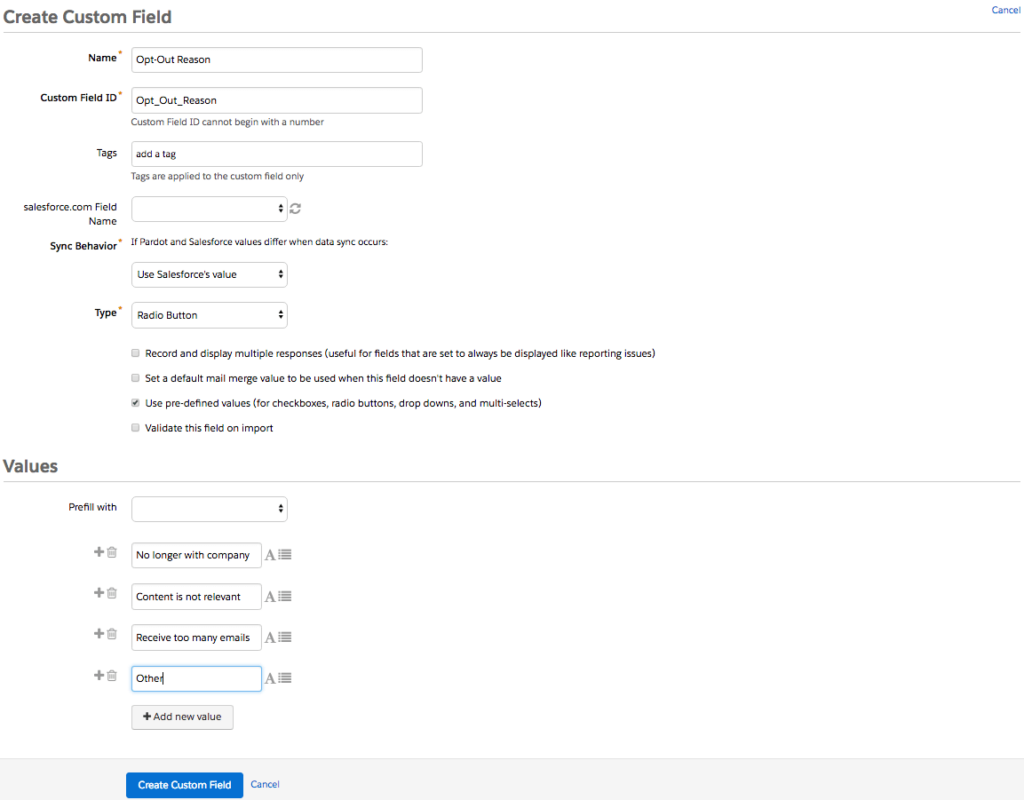
Create a Custom Radio Field
First things first, let’s create a custom radio field to store the opt-out reason. Our client’s configuration is below, but you can customize to your specific needs:
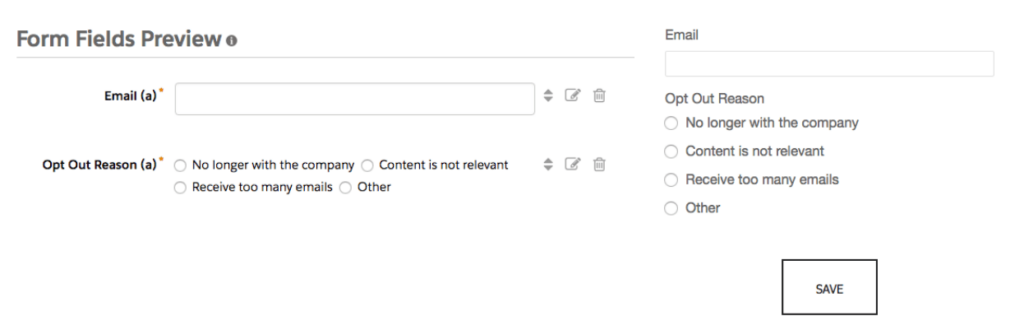
Create a Form with Custom Field
Next, we need to create a simple Pardot form. The form will leverage the field we just created and be used in combination with the Unsubscribe (and Preference) pages. As you can see below, I configured both fields to be required and to always display. Not pictured, I set the redirect location to go to the client’s homepage upon completion and created a basic layout template to style the form to fit into the unsubscribe page:
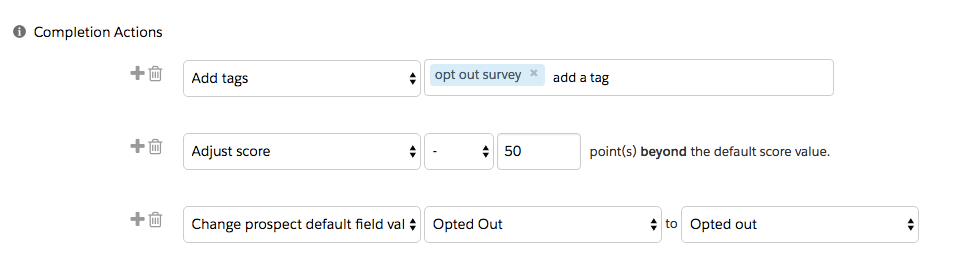
As part of building the form above, you will want to build completion actions that make sense. One important step: a completion action that changes the Opted Out field to ‘Opted Out’ and/or the Do Not Email field to ‘do not email’. This will insure prospects do not receive any emails in the future.
Depending on your account’s setup, you may also want to subtract points for the form completion (since default points will be awarded), notify the prospect’s assigned user so they can potentially follow up, or you may want to add these prospects to a specific Pardot list to report on later. Either way, don’t ignore this section. Here’s what ours looked like:
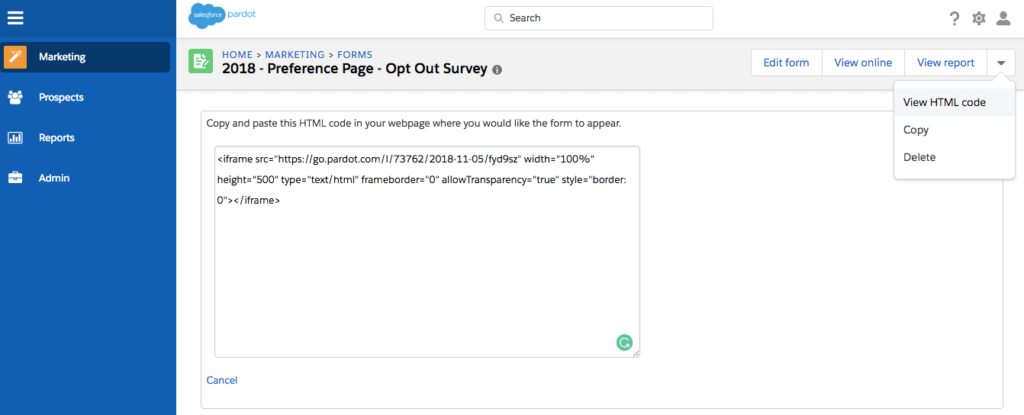
After you finish the form and before you move onto the next step, make sure you copy the HTML iframe code. You will be using this in the next step:
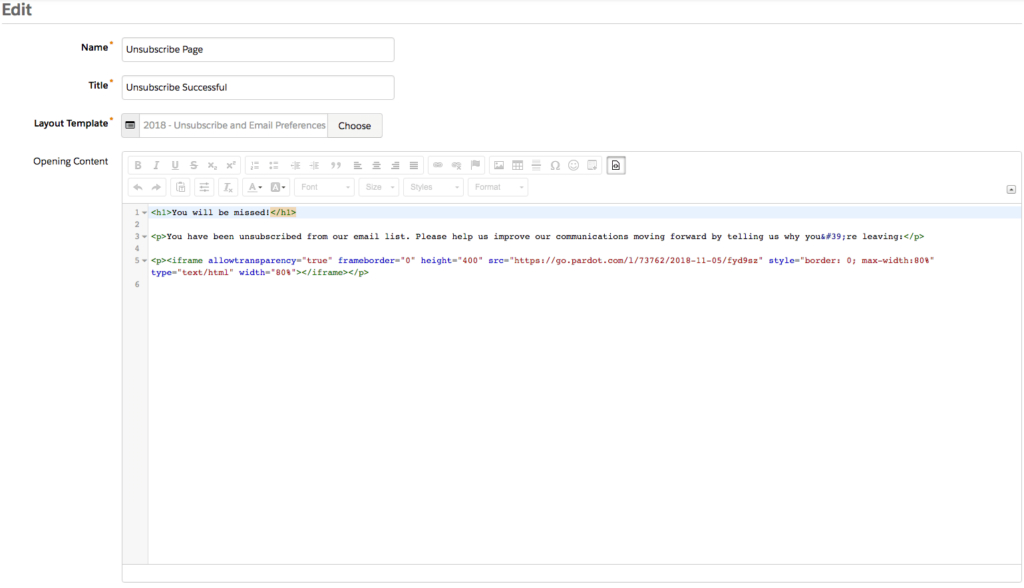
Update Your Pardot Unsubscribe Page
Finally, let’s start configuring our email unsubscribe page. Navigate to Marketing > Emails > Unsubscribe Page. In the upper right-hand corner of the window, click “Edit”. Here you can configure unsubscribe page settings, like applying a layout template and editing the opening content with a WYSIWYG editor:
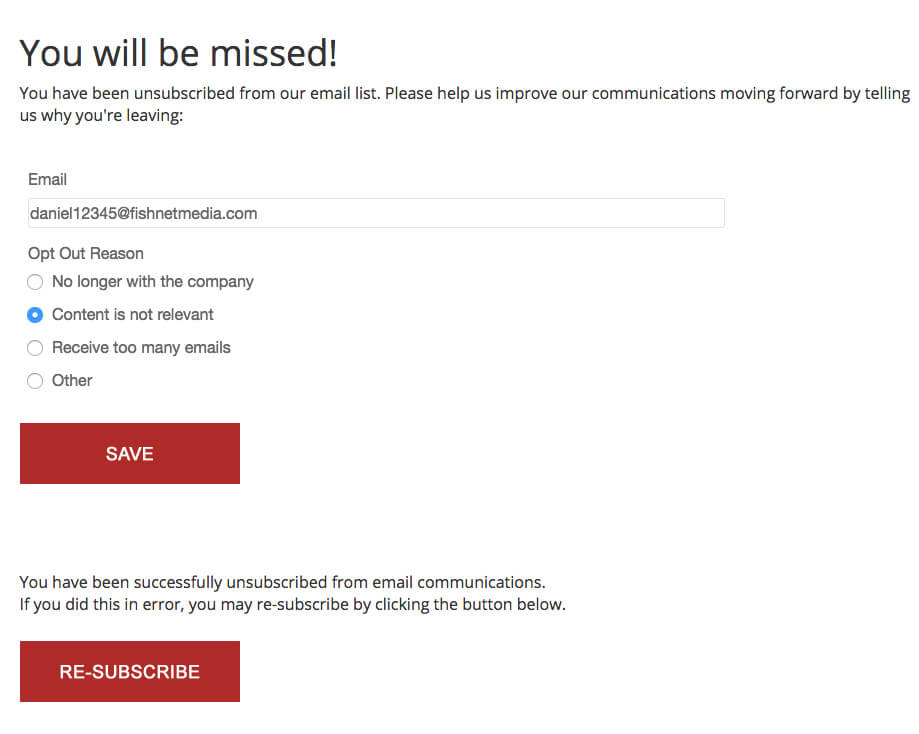
After saving, you can view the final product by visiting the unsubscribe page. Here’s what our client’s final page looked like:
Create a Layout Template to Apply to the Unsubscribe and Preference Pages
You’ll notice that we applied a layout template with basic CSS styling to make the page look a little nicer and match the client’s branding (fonts and colors). I recommend this approach in every Pardot account I work on. Even if the design is super simple, it will go a long way with the user.
At this point, the unsubscribe page survey is completed. Moving forward, any prospect who opts out of receiving your Pardot emails will be presented with a survey asking why.
Although not necessary to capture the opt-out reason, I put together some additional information as it relates to configuring an email preference center in Pardot.
[/et_pb_text][/et_pb_column][/et_pb_row][/et_pb_section]