Capturing a Webpage URL in a Hidden Field of a Pardot Form in 4 Steps
Note: Explaining how to gate multiple assets using only one Pardot form is an advanced Pardot topic that deals with custom JavaScript. I recommend enlisting the support of a developer if you’re not familiar with using Pardot at this level.
I’m a huge fan of the flexibility Pardot gives users in developing custom marketing automation solutions. There are often multiple paths that can be taken to meet project requirements, which makes my work easier. The trick to developing these solutions, though, is to have a clear set of requirements laid out in front of you before beginning.
Recently, Fishnet developed a new website for a client that put Pardot’s functionality to the test. As part of the website, we implemented Pardot as their marketing automation tool. One of their requirements was that they needed to gate more than 20 different assets; however, they didn’t want to maintain a different form for each asset. Additionally, they wanted to be able to see a log of which assets had been downloaded. With only one form, this situation presented a challenge.
The solution we identified involved creating the following:
- Two custom hidden form fields
- One Pardot form, with both custom hidden fields
- Javacript code to capture the custom hidden field values
- An Autoresponder with Dynamic Content
Creating Two Custom Hidden Form Fields in a Pardot Form
Since there is only one form on more than 20 different pages, we needed a way to identify on which page(s) the form was completed. We accomplished this task by creating two new custom fields with the type of “Hidden” using the names below: (You’ll want to remember both Field IDs for a future step)
- “Most Recent Product Form Completed”
- “Product Form(s) Completed”
The “Most Recent Product Form Completed” field will use JavaScript to store the URL for the page on which the form is located. Every time the form is completed, the existing value will be overwritten with the new page URL value.
The “Product Form(s) Completed” field will store the URL for the page on which the form is located using JavaScript as well; however, it will also store all other previous page URLs on which the form was completed. When you create this field, it is necessary that you select “Record Multiple Responses”, which will allow for multiple values to be stored in the field as a list.
Just to clarify, we used two different form fields to meet the client’s project requirements–they wanted a way to see all assets that were downloaded. In this article, I’ll detail how each of these fields are used.
Create a Form with Both Custom Hidden Fields
Now that you’ve created both hidden fields, you can go ahead and build your form to gate the assets. In our case, we created a very simple, three-field form (First Name, Last Name and Email), and then added the two hidden fields I detailed above. The configuration should look similar to this:
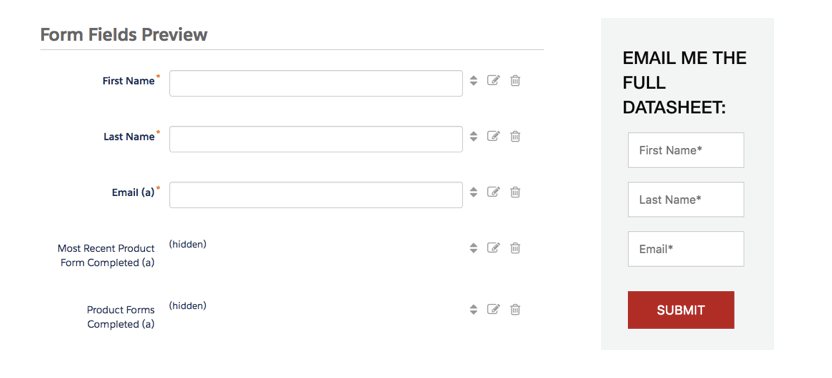
Note: When you add both hidden form fields, you need to make sure to select “Always display even if previously completed” in the Advanced section:

Add Javacript Code to Capture the Custom Hidden Field Values in the Pardot Form
At this point, you have a form with some hidden fields. In order to capture the page URL in both hidden fields, you need to copy and paste the following JavaScript code in the Pardot Layout Template that the form is using:
In the <head> tag:
<script src="https://ajax.googleapis.com/ajax/libs/jquery/1.11.3/jquery.min.js"></script>
Below the closing </html> tag:
<script>
jQuery(function($){
       if($("#pardot-form").length>0) {
              $("#pardot-form .Most_Recent_Product_Form_Completed input, #pardot-form .Product_Forms_Completed input").val(document.referrer);
       }
});
</script>
Make sure the field input names match up with the hidden field API names. You can get those by going to Admin > Configure Fields > Prospect Fields and finding the corresponding fields.
With the current configuration, every time the form gets submitted both hidden fields would log the URL for the page on which the form was completed. Additionally, the “Product Form(s) Completed” field would log the URLs for all the pages on which the form was completed. Prospect records will look like this:

Create an Autoresponder Using Dynamic Content
Our final step is to automate based on the values in the hidden fields and deliver the correct asset. We accomplished this task using Dynamic Content in an Autoresponder.
We created a new Dynamic Content block and based it on the custom field I created earlier: “Most Recent Product Form Completed”. My Dynamic Content block looked like this:
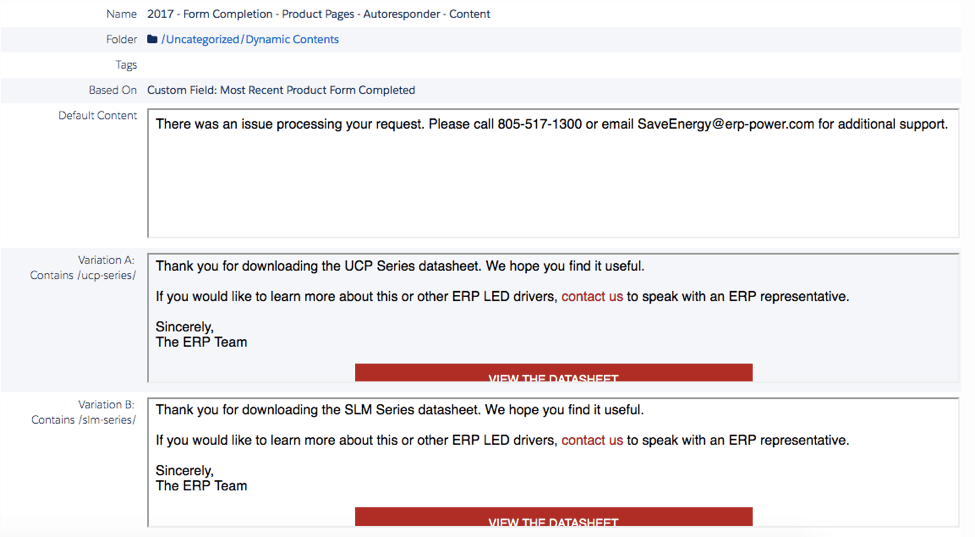
You’ll notice a couple of things here. First, we crafted a universal message, which could be used for all assets. Second, each variation has a “View the Datasheet” CTA. Each CTA contains a link to a different asset, which corresponds to each page URL variation. You will want to have a variation for each page on which the form will live. It is also important to keep in mind that if any of these page URLs change, the Dynamic Content will not function correctly.
We also created default content with instructions to contact a phone number or email directly. If someone has JavaScript disabled, the hidden value won’t be stored in the custom fields we created and we won’t be able to deliver the correct asset. This way, we give them instructions to reach out and we can help them get what they requested.
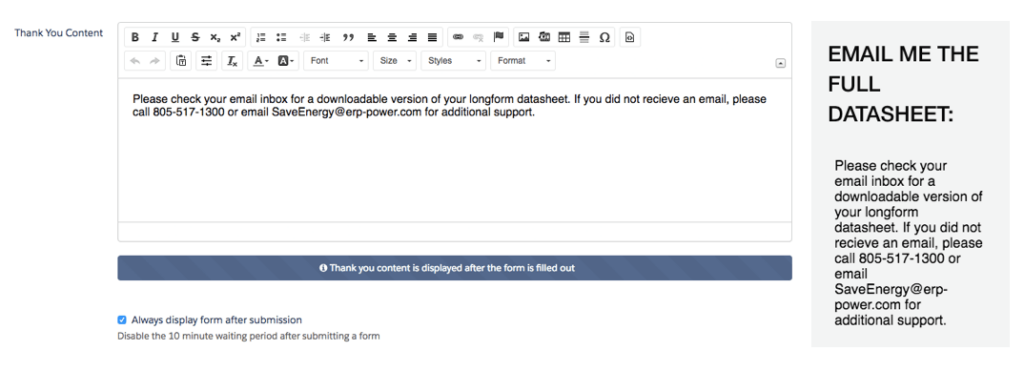
We put this Dynamic Content into an Autoresponder email and added it as a completion action to the form created in an earlier step. We ended up with something that looked like this:

It is worth noting that we created a Thank You message for the form, which let the prospect know an email was on the way.
There you have it. One form gating 20+ assets, all built within one Pardot form.
We took what appeared to be a complicated client request and divided it up into logical steps. We identified a set of requirements and built them into a solution that works. And if it didn’t work, we built in functionality to address potential shortcomings.