Learn How to Integrate Gravity Forms with Pardot with Step by Step Instructions
This post provides a step by step guide for a Gravity Forms Pardot integration using a form handler.
As a consultant, I work with a number of clients on a regular basis, and they all have their own marketing tech stacks, which keeps things interesting. Luckily though, many of them use Gravity Forms as a form solution on their websites.
Through that experience I’ve learned the ins and out of integrating Gravity Forms with Pardot.
Here’s everything you need to know to integrate Gravity Forms with Pardot – follow these simple steps and read to the end where I address some commonly-asked questions.
Install the Gravity Forms WordPress Plugin
It almost goes without saying, but the first step is to install Gravity Forms. Keep in mind that Gravity Forms is a paid plugin, although it starts at only $29 per year as of the writing of this article. Typically, the fee is $59 for the Basic plan, which covers one site.
The fee is well worth it in my opinion, but there are also plenty of sufficient free options if you want to go that route.
You’ll need an account to download the plugin. After you sign up, you can access the download link from the help documentation page.
Create a Form in Gravity Forms
Once you have the plugin installed on your site, it’s time to create the form. Build out (or rebuild) any web form.
What I like about Gravity Forms is that it’s super easy to customize the look and feel of their forms. There are one-click settings for things like having placeholder text. It’s much easier to style these forms as opposed to your traditional Pardot iframe form.
For those unfamiliar with the tool, I recommend you check out the Getting Started page and browse through the documentation. There will be loads more information than I can provide in a single blog post.
After you build out the form, you’ll be ready to move onto the next step of creating your form handler in Pardot.
Create a Pardot Form Handler
In Pardot, navigate to Marketing > Forms > Form Handlers and click “+ Add Form Handler”.
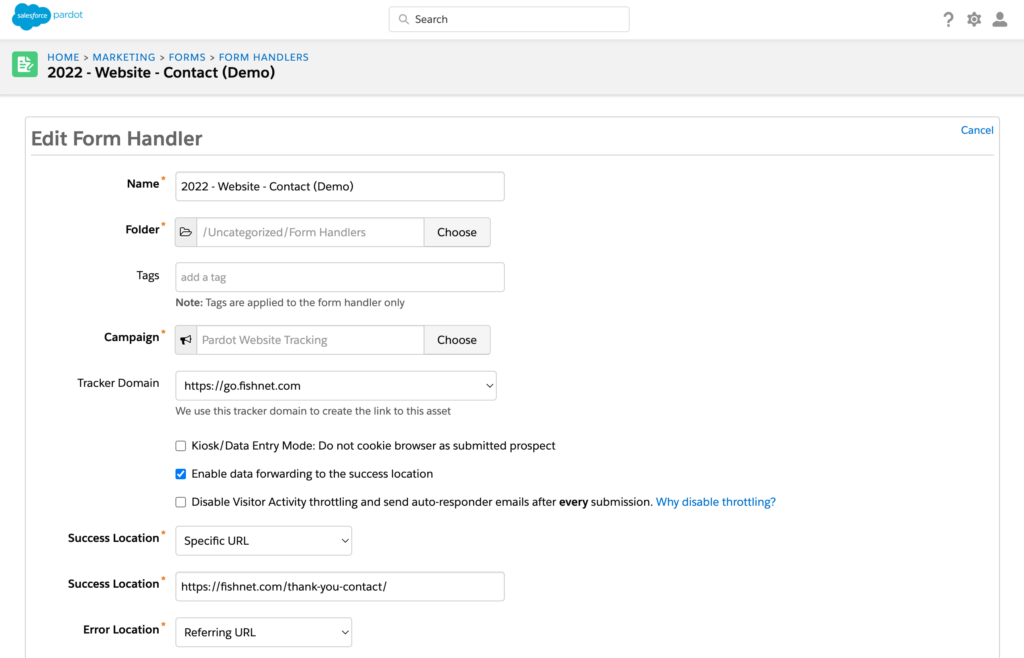
Fill out all the required fields like Name, Folder and Campaign. Then make sure you select “Enable data forwarding to the success location”. When Pardot receives the post, the same data post is transferred to the success location.
For the success location, choose “Specific URL”. Make sure to fill out the next field with a URL as part of the configuration. This will allow you to redirect the user back to a thank you page on your website after the form has been submitted.
Your screen should look something like this:
Map Pardot Form Handler Fields to Gravity Forms Fields
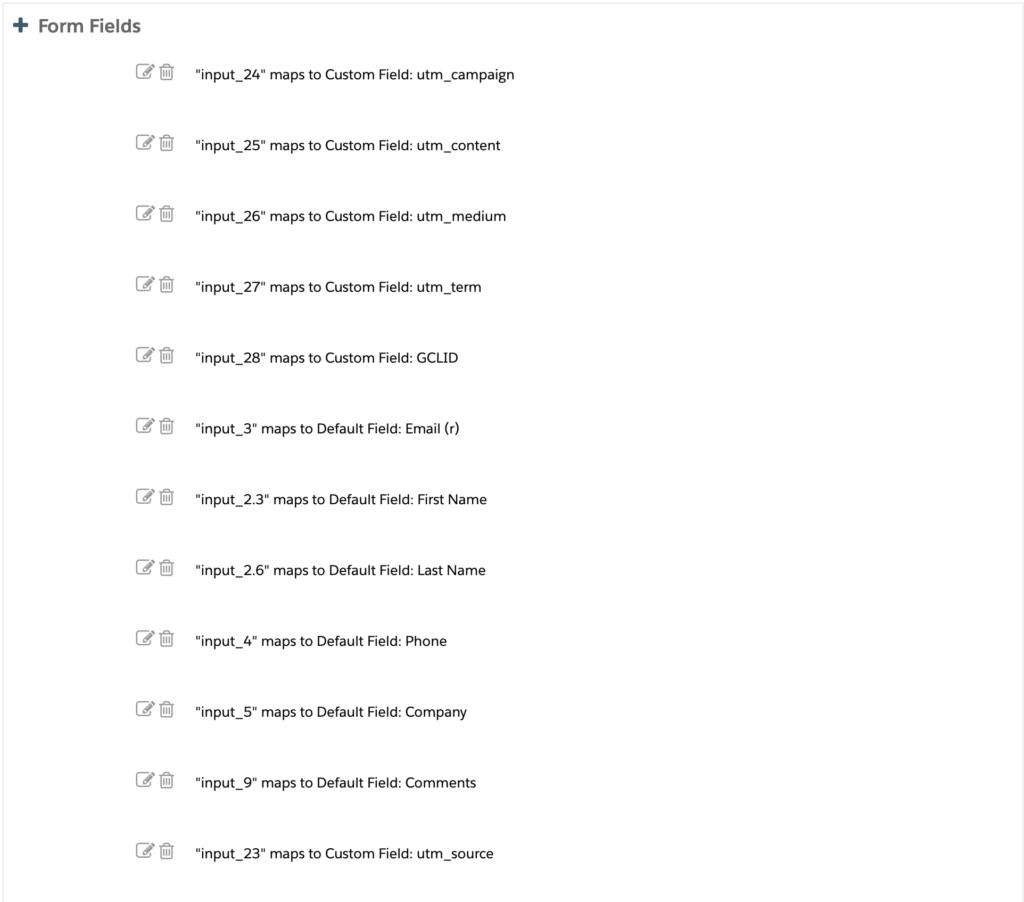
Moving down the screen you’ll see an area to map form fields. In the screenshot below you can see that I mapped the field ID in Gravity forms to the corresponding field in Pardot:
You can find the field IDs in Gravity Forms two different ways:
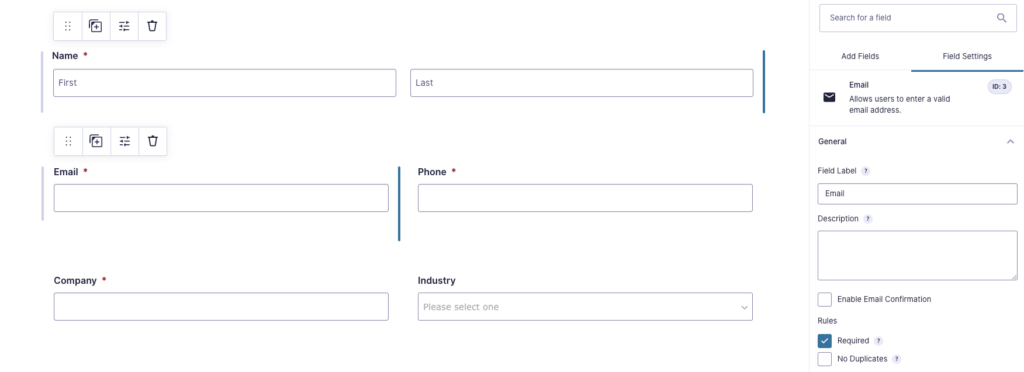
The first way is to go into the applicable Gravity Form and select the field you want to map. In the screenshot below, “Email” is selected. Looking at the right side of the image you can see the text “ID: 3”.
Looking back at the previous screen shot in the Pardot Form Handler mapping area you can see that I used “input_3” to map the ‘Email” field.
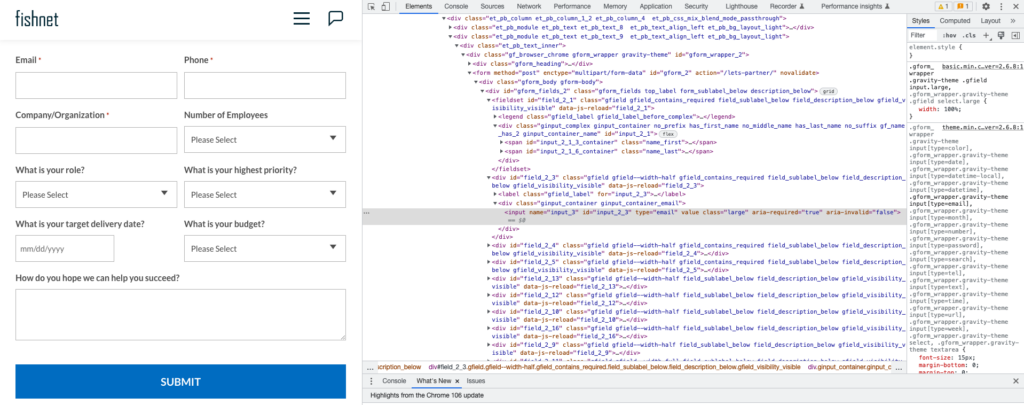
The other way is to navigate to your published form on your website and inspect the page. In the screenshot below you can see <input name=”input_3”>. This text is what you would use in the Pardot Form Handler field mapping area.
This step should be done with all form fields.
Important Note: Make sure not to make any fields “required” in Pardot to ensure that all submissions make it through without any errors. For example, if you required a phone number in Pardot, but didn’t require one in Gravity Forms, you could get an error and the submission wouldn’t make it into Pardot.
Configure the Confirmation Settings: Pass Field Data Via Query String in Gravity Forms
The final step is to configure the confirmation settings in Gravity Forms. In WordPress, navigate to the applicable Gravity Form and then select the “Confirmations” tab. Add a new confirmation. You’re screen should look similar to the one below:
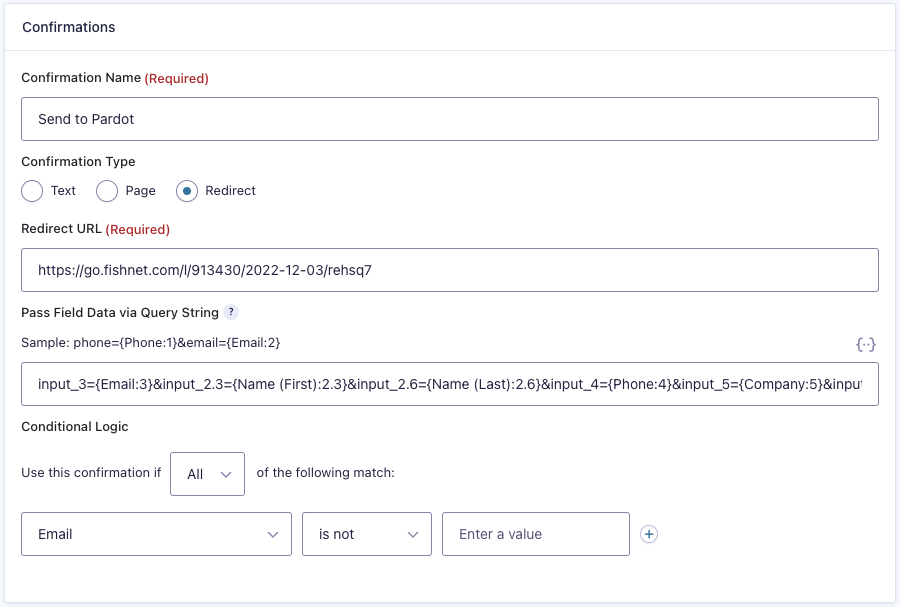
For the ‘Confirmation Type’ select “Redirect”.
For the ‘Redirect URL’, paste in the Pardot Form Handler URL, which you can find in the applicable Pardot Form Handler page listed as the “Endpoint URL”.
Finally, the most important step is to complete the query string to pass field data into Pardot. Doing so will tell Gravity Forms how to push the relevant data into Pardot.
The string should follow this syntax:
pardot-field={Gravity Form Field}&pardot-field={Gravity Form Field}&…
The pardot-field value will be what you used to map in Gravity Forms. So in our example above for the ‘Email’ field, we would use:
input_3={Email:3}&…
You should map every form field to all Pardot fields in this step.
The final step is to set the ‘Conditional Logic’. In most cases, assuming you don’t have any special requirements to send data elsewhere, you will want to mirror the settings in the screenshot above, which essentially tells it to trigger this confirmation if the ‘Email’ field is not blank.
You will want to test the form to make sure that it’s working properly. Once you can validate, then you’re all set!
Field Types to Consider
There are a handful of field types in Pardot for you to consider when mapping. Depending on the Pardot field type, it will determine how you want to format the data in Gravity Forms before it gets into Pardot. Here are the field types you should consider using:
- Text – You can use a standard text field. The only thing to note here is that there is a 65,535 character limit, although I would assume most submissions wouldn’t hit that number. The only case I have seen this trigger an error is when a SPAM submission fills out a wall of text on a comments section. You can prev
- Number – Make sure you format the field type in Gravity Forms to only accept numbers. Otherwise the field may not populate when passing data if it contains text characters.
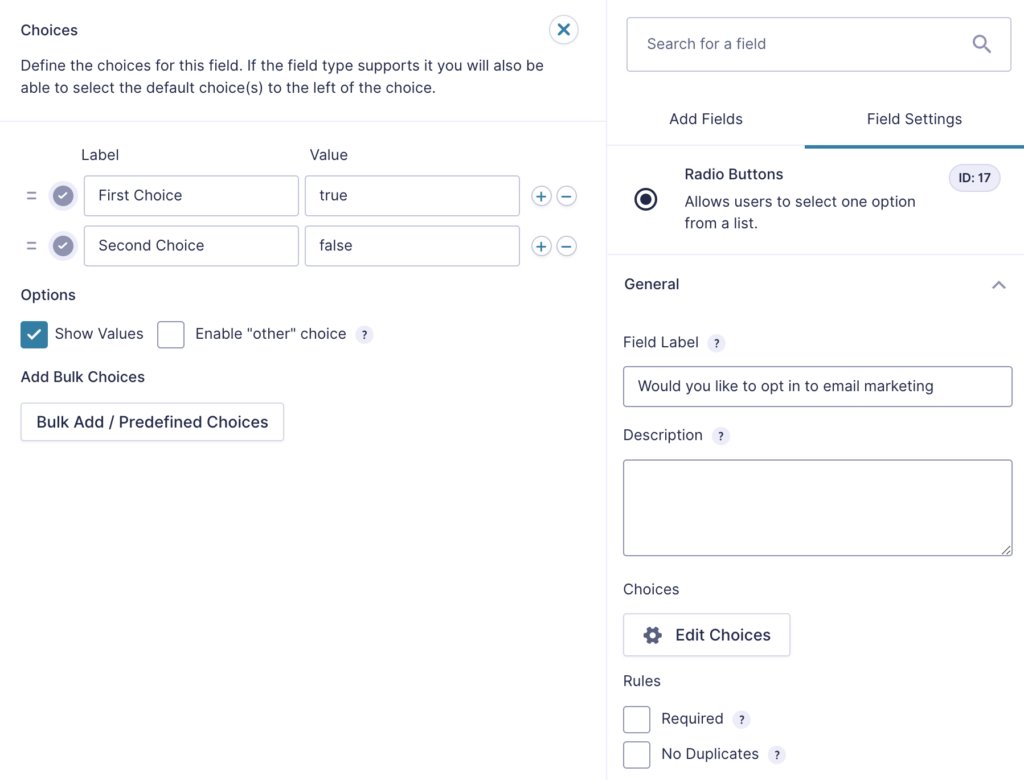
- Radio Button – Make sure you are sending either “true” or “false” (case-sensitive) to Pardot. You can do this by selecting the particular field in Gravity Forms and then clicking “Edit Choices”. You can then click the checkbox “Show Values” which allows you to edit the value the value that gets sent to Pardot, as opposed to what the label shows up
Summary
Take the time to test your form and make sure everything is mapping over correctly. Otherwise, follow the instructions in this post and you should be ready to use Gravity Forms with Pardot Form Handlers.
Gravity Forms Pardot Integration FAQs
I came across a few common questions when researching this blog post, so I thought I’d share them here for others.
How do I know if my form submissions made it into Pardot?
You can periodically audit your Gravity Forms by reviewing past submissions and spot-checking to see if they made it into Pardot. You can view past submissions by clicking the “Entries” tab in Gravity Forms.
Additionally, you can turn on “logging” in Gravity Forms settings to better understand any errors and why they may be occurring. I’ve used it to see if there were field mapping errors before; it’s a very helpful way of diagnosing potential issues.
What is the difference between a Pardot Form and Form Handler?
If you ask a seasoned Pardot administrator if they prefer native Pardot forms (which use an iframe) or form handlers, you’ll most likely get a split response. That’s because both have their pros and cons. The main difference is that native Pardot forms allow for progressive profiling, provide form view and error data, and they integrate with Pardot landing pages. On the other hand, form handlers allow for integration with third-party form solutions (like Gravity) and are much easier to style and customize. Pardot provides a breakdown of both and their features.
One of the many reasons I love Pardot is how flexible it can be. There is no one solution to your problem, typically there are many!
Where can I read more about Pardot Form Handlers?
Pardot documentation is a good place to start. Considerations for using Pardot Form Handlers.