Part 2: Configure Email Preferences to Better Understand Subscriber Behavior
This post about configuring an email preference page in Pardot is a continuation of information, related to Pardot email preferences and unsubscribes, from a previous post “Capture Why Prospects Unsubscribe in Pardot”
Preference centers are important because they allow prospects to choose which email communication they want to receive, rather than completely opting out. I encourage users who are unfamiliar with setting up a preference center to read on…
Create or Update a Pardot Email Preference Page
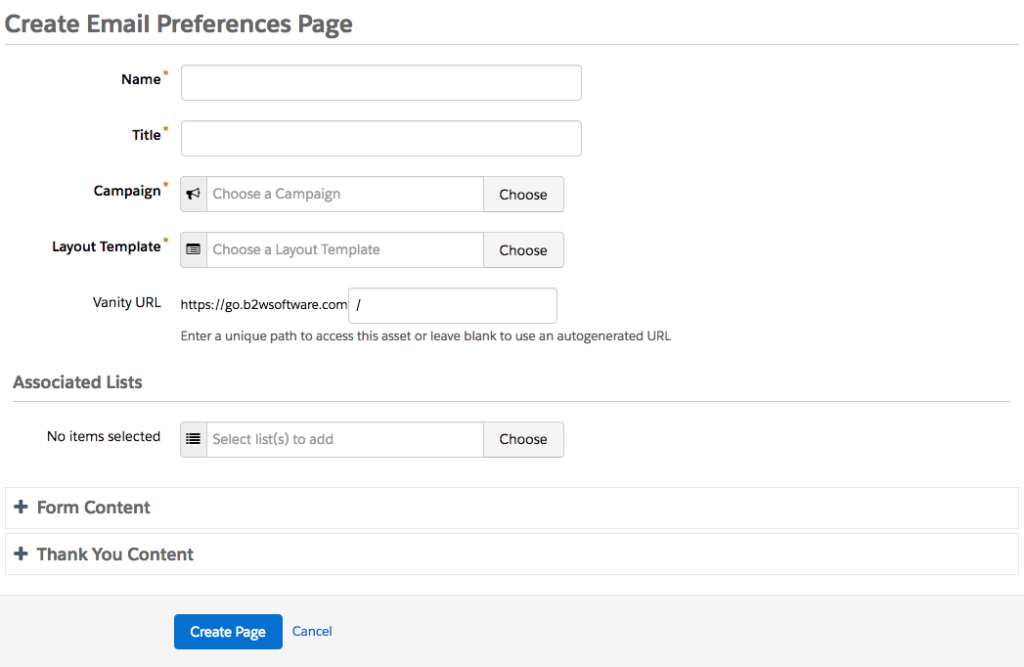
Let’s start configuring our email preference center. Navigate to Marketing > Emails > Preferences Page. Every account will contain a “Default Email Preference Page”, or you can create a new one. The default version will contain any list marked “public” (more on public lists below) and potentially any public dynamic lists of which the prospect is a member. If you create a new preference page, you can choose specific public lists that you want to include, and public dynamic lists will automatically be included:

Complete the “Create Email Preferences Page” wizard above, making sure you include specific lists that you’re using to communicate with customers. As mentioned earlier, you can also apply a layout template here to style the unsubscribe page, which is recommended. Additionally, if you expand the “Form Content” and “Thank You Content” sections, you will be presented with additional options to customize the page, but I have found the default works just fine. Here is a basic sample preferences page I created:

If the user clicks “Save Preferences”, they will see a message indicating which lists they’ve subscribed to. If they click “Opt out from all email communications”, they will be unsubscribed and shown the opt-out survey we created in the previous post.
Create a Public List for your Email Preference Center
A preference center only displays lists marked as “public”. So, let’s make sure we have at least one public list to display in our preference center. Take a look at the “Add List” screen:

Name your list accordingly, using the correct naming structure/syntax that has been established for your account (remember, this is for internal use). Fill out the other fields as desired for the specific list, then check the “Public List” box when you get to it. This action will allow you to configure options for the Preference Page:
- Label – This is what displays on the front-end of the Preference Page, or what the customer/client sees.
- Description – This also displays on the front-end of the Preferences Page, allowing you to provide additional details.
- Preference Page (In the screenshot above, this is next to the text that reads “No items selected”) – This list will automatically display on the default email preference page, but if you created a custom email preference page, this is where you can add to it.
You can repeat this process and create as many new lists as you want to display. You can also edit existing lists and check off “Public List”.
That’s it! If you have any questions on setting up your unsubscribe or preference center pages please reach out to us.


